Getting Started
These steps are for first-time users of WP-CRM System. It will guide you through everything you need to know in order to get started.
Install WP-CRM System #
- First, log into your site with an administrator account.
- Navigate to Plugins, then click Add New.
- In the search box to the right, type WP-CRM System
- Click the Install Now button in the WP-CRM System box
- After the plugin has been installed, click the Activate Plugin button.
Set up WP-CRM System Options #
Once the plugin has been activated for the first time, you should find a notice at the top of your screen saying “Please visit the WP-CRM System Dashboard page to set your options and complete set up.” Click the link in that notice to be directed to the correct page. Here is a detailed guide for configuring the basic settings in WP-CRM System.
Installing Premium Extension Plugins #
The paid add-ons or extensions for WP-CRM System get installed in a slightly different manner than the core WP-CRM System plugin.
The WP-CRM System core plugin is freely available to anyone, so it is available through WordPress.org, which allows you to install it through your dashboard as described above. However, the paid add-ons are not available through WordPress.org, so they need to be manually uploaded. This will walk you through those steps.
When you purchased WP-CRM System extensions, you should have received a purchase confirmation email, which includes a link to download the plugin file(s) as well as your license key(s). It should look something like this:
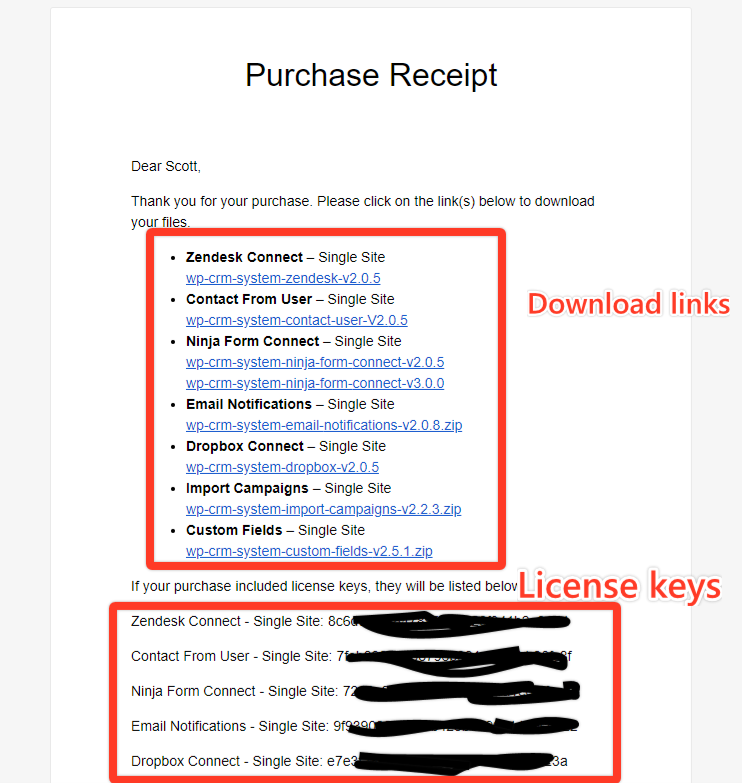
Click on the download link(s), which will prompt you to save a ZIP file to your computer.
If you didn’t receive the purchase receipt email, it may have ended up in your email spam or junk folder. If for some reason it isn’t in your inbox or spam folder, you can access the download link from your account.
Once you have the ZIP file(s) saved to your computer, navigate to your WordPress site and login as an administrator.
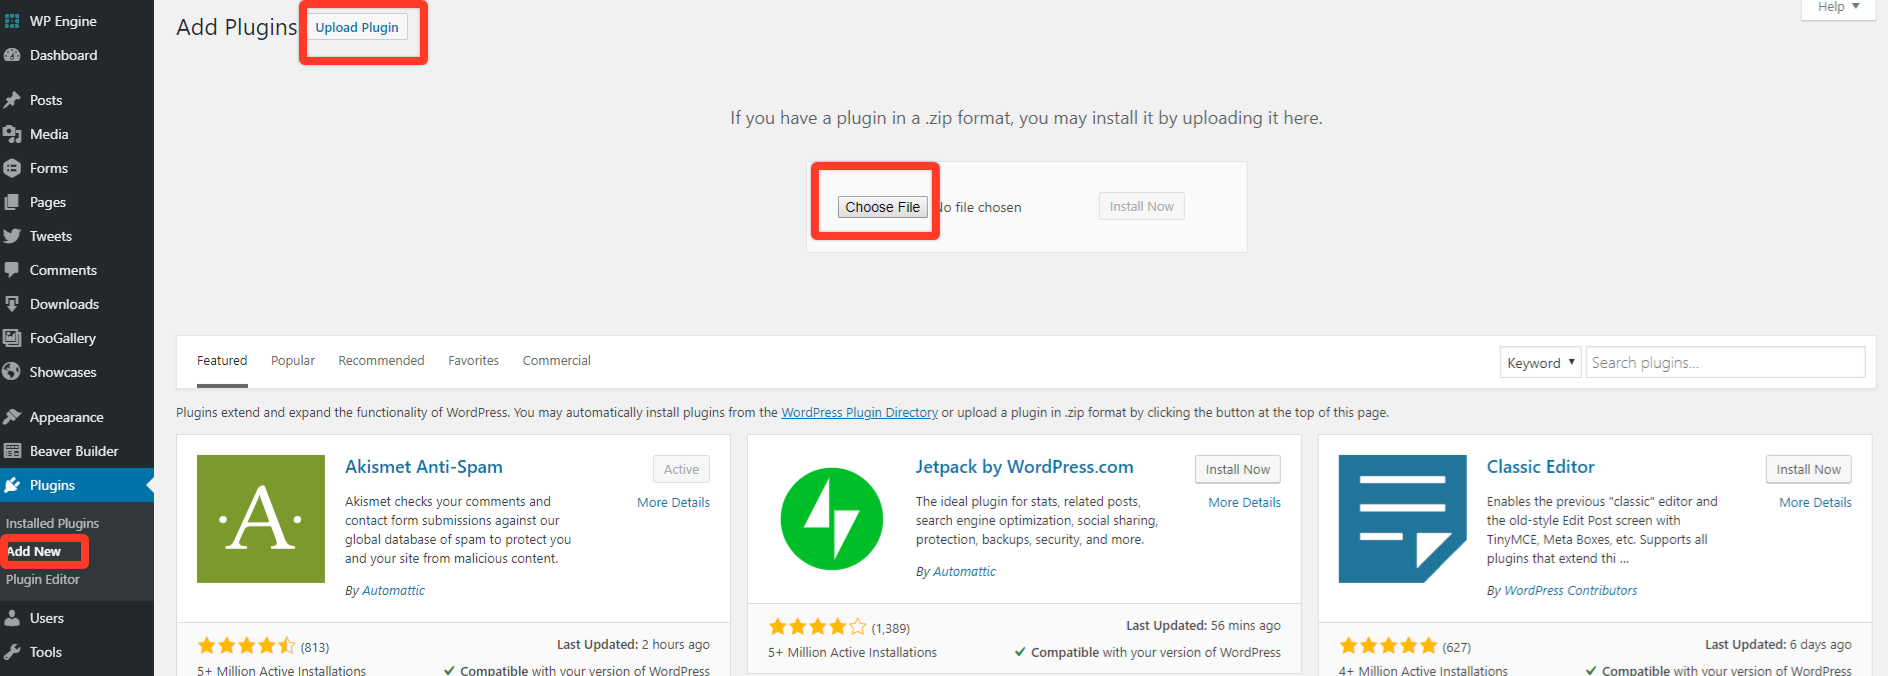
Navigate to the Plugins > Add New page on your WordPress site, and click the Upload Plugin button.
A file uploader prompt should appear. Click the Choose File button and select the plugin’s ZIP file that you saved to your computer earlier.
Finally, click the Install Now button on the right side of the file upload field.
The plugin will begin to install. Once it completes it will prompt you to activate the plugin. Click on the link to activate the plugin.
Repeat the upload/activation process for each extension you purchased and are planning on using on your site.
That’s it! WP-CRM System and your extensions should be installed, activated, and ready to use.


