Setting Up Ninja Forms Connect [Ninja Forms Version 2.9.x and below]
These instructions are for users of the 2.9.x version of Ninja Forms. This version is no longer supported. This documentation will remain here for existing users who have not yet updated. For all future users, please update to the latest version of Ninja Forms.
These instructions are for users who have rolled back to the 2.9.x version of Ninja Forms. If you have not rolled back to Ninja Forms version 2.9.x, and are using a 3.0 or later version, you do not need to roll back. These instructions do not apply to your setup.
If you are a user of Ninja Forms, the Ninja Forms Connect extension is a great way to create new contacts in WP-CRM System automatically.
To do this, you will need to have Ninja Forms installed and activated. Ninja Forms is a free form plugin for WordPress, which can be downloaded from the WordPress plugin directory.
Ninja Forms Settings #
These instructions are only for users who have rolled back to version 2.9.x of Ninja Forms. This setting is found in Ninja Forms > Settings > Advanced Settings section.
You must be running WP-CRM System’s Ninja Form Connect extension version 2.0.5 or earlier in order for these instructions to work. If you have updated to a later version of our plugin (3+), you can download the 2.0.5 version from your account.
Create a New Form #
If you do not have an existing form created, you can easily create one by clicking Forms > Add New. Alternatively, you can edit an existing form. At a minimum, your form will need two separate fields for a First and Last Name. All other fields are optional, but including them will help gather a more complete contact record for you.
When you create or edit a form, you will need to make note of several IDs. The first, and most important is the Form ID number. This can be found in the URL in your browser’s address bar. On the form edit page, the form ID can be found after form_id=.
You will also need to make note of the field IDs for each field that you want to attribute to your new contact. You can view the individual field IDs by clicking on each field to expand the options.
The available fields are:
- First Name
- Last Name
- Role
- Website
- Address 1
- Address 2
- City
- State
- Postal Code
- Country
- Phone
- Mobile
- Fax
- Additional Information (this can be any other text-based field).
Other than First Name and Last Name, you can collect as little or as much additional information from each form submission as you want.
Configure WP-CRM System Ninja Form Connect #
Now that you have the form and field IDs, you will need to map the Ninja Form fields to WP-CRM System’s Contact fields. This process is fairly straightforward.
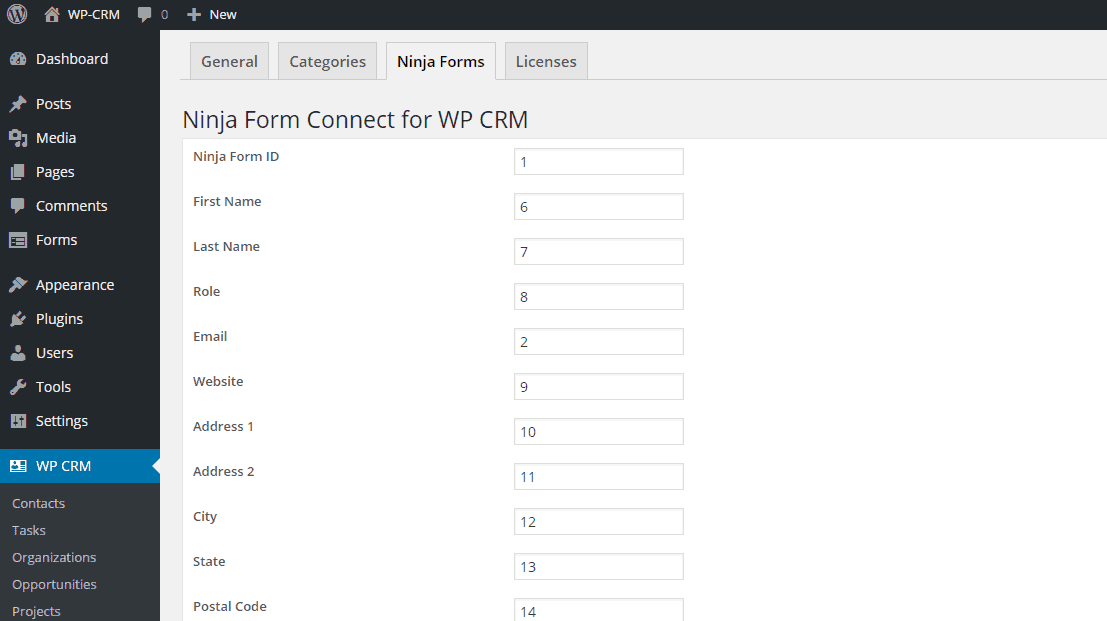
On the WP-CRM > Settings page, click the Ninja Forms tab.
Enter the IDs in each of the fields that you want to collect information from, and click Save Changes.
-

- Map the Ninja Form form ID and field IDs to the appropriate fields.
-
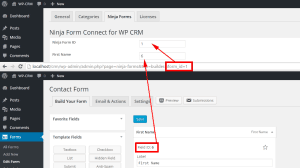
- How to find the Ninja Form field and form IDs to map in WP-CRM System.

Make Sure The Form is Active #
You will want to make sure that the form you gathered the field IDs from is active on your site. This is the only form that will create a new contact in WP-CRM System for you, so you will want to make it easily accessible.


