Configure Slack Notifications
The Slack Notifications extension is a great way to keep your team up to date with any updates to projects, opportunities, or tasks. The nice thing about this extension is that once you set it up you shouldn’t have to think about it again unless you want to change some of the settings.
Slack Setup #
If your team has been using Slack for a while already, you can skip down to Setup a Webhook below. However, if you haven’t done so already, now would be a good time to set up a new Slack team.
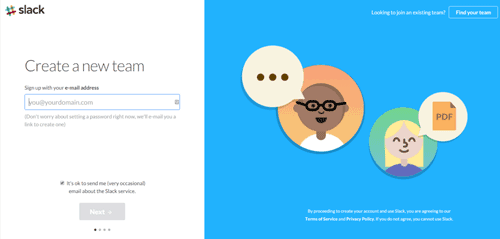
Follow the simple setup steps provided by Slack to get set up.
Once your team has been created you’ll want to invite other team members by using the Invite People link on the left side of your feed (it’s no fun to talk to yourself anyway).
Next, you will want to decide where WP-CRM System should send notifications. You can set up a new channel specifically for WP-CRM System notifications, or you can decide to use an existing channel like #general. You can change this later, but it’s good to think about how you want to receive notifications early on.
Setup a WebHook #
From your Slack team page, click the arrow next to your team name then choose Apps & Custom Integrations from the menu, then search for Incoming WebHooks.

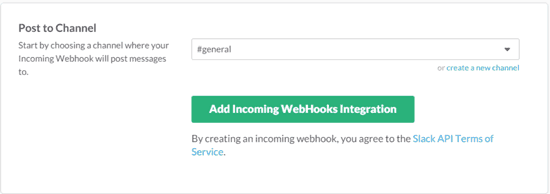
On the next page, you’ll be asked to select a channel that this webhook will post to. Use the drop-down menu to select a channel or the link below it to create a new channel. While you need to select a channel for the webhook to work with, you can change the channel it posts to in your WP-CRM System settings later on. Finally, click the Add Incoming WebHooks Integration button.
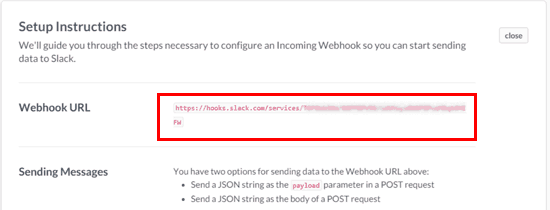
Your webhook URL will be displayed for you on the next page. Copy the full link provided. You can forget about the rest of the instructions on that page (we took care of that for you).
Note: Sometimes the URL will wrap onto two lines. Be sure to copy all of the URL including the stray characters on the second line.
WP-CRM System Slack Notification Settings #
Now that your Slack team, channel, and webhook have been set up, you can get WP-CRM Slack notifications set up in a few simple steps.
Make sure you have both WP-CRM System and the Slack Notifications extension installed and activated.
Your Slack notification settings can be found by visiting WP-CRM > Settings in your site’s dashboard, then click the Slack tab at the top.
- Check to Enable Slack Notifications: This box must be checked to allow notifications to be sent to your Slack channel. In some cases you may wish to temporarily disable notifications. This option allows you to turn them off without having to delete any of your other settings.
- Enter Bot Name: This is the name that will show up at the top of the notification in Slack. Something like CRM Notification might work.
- Enter emoji icon for your bot: You may want to call attention to your notification with a special icon. There are hundreds of icons available, which you can find on www.emoji-cheat-sheet.com. You will need to copy the text including the colons next to the icon to enter as the setting (i.e. :exclamation:, :whale:, etc.).
- Enter your Slack Channel Name: This is where you can enter the channel name that Slack will post to. You can enter the channel you used when you initially set up the webhook, or you can enter any other channel in your team. You can even enter a username if you want a specific person on your team to be notified of updates by using @username instead of #channel.
- Task|Opportunity|Project Notification Message: Here is where you can customize the message that is sent whenever a task, opportunity, or project is added or updated. You can put in as little or as much information as you’d like – whatever makes sense for your team. You can even customize the message for each type of notification. To make your life easier, there are a few placeholders available for each type of notification. Simply copy the placeholder including the curly brackets {} and place it wherever it should appear in your message.
After you have finished entering your settings, click the Save Changes button and you’re done!

How to Turn Off a Notification #
If you don’t want your team receiving notifications for a certain type of message simply leave the message box blank for the notification that shouldn’t be sent. The system will still send notifications for the other messages if you have them set up.
You can temporarily disable all notifications without changing any settings by unchecking the Check to Enable Slack Notifications box at the top of the page.


