Setting up Custom Fields
Working with custom fields gives you a lot of flexibility especially when it comes to keeping track of data that is unique to your organization. The Custom Fields extension for WP-CRM System allows you to add fields that are specific to a type of record. For example, you wouldn’t need to know a project’s Twitter handle, but you might want to keep track of your customers social media presence. With the Custom Fields extension you can specify which record type a custom field is assigned to.
How to Add Custom Fields in WP-CRM System #
First you will need to install and activate the Custom Fields extension for WP-CRM System.
From there you will want to navigate to WP-CRM System > Settings in your site’s dashboard. Next, click the Custom Fields tab at the top.
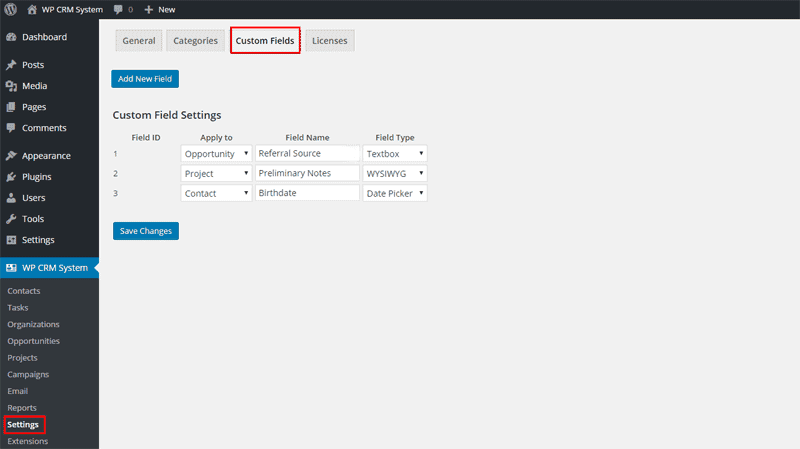
To add a new field simply click the Add New Field button at the top of the page. Once the page refreshes you’ll have a new empty field to populate at the bottom.
If you have made changes to any existing fields, be sure to save the changes before adding a new field.
There are three settings you will need to fill in for each field.
- Apply To: This refers to the type of record that this field should apply to. Contact, Organization, Opportunity, Task, Project, or Campaign.
- Field Name: This will give the field a label on the edit screen so you can easily identify it.
- Field Type: The dropdown menu will let you choose from one of the following types of fields. Choose the field that is appropriate for the information you are gathering.
- Textbox: A normal single line textbox.
- Textarea: A multiline textarea.
- WYSIWYG: A textarea with basic HTML formatting controls. The same editor you see in a normal blog post. (WYSIWYG = What You See Is What You Get)
- Email: A field to accept an email address. It will validate the field when you save or update the record to ensure a valid email address was entered.
- URL: A field to accept a website URL. It will validate the field when you save or update the record to ensure a valid URL was entered.
- Number: A single line textbox that only accepts numbers. Any letters, spaces, or special characters will be removed when saving the field.
- Datepicker: A textbox that allows you to select a date from a small popup.
Once you have entered all of the data click Save Changes.
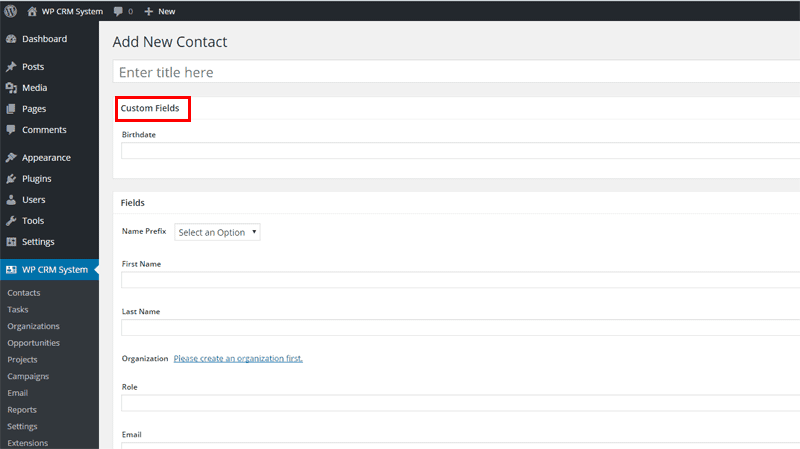
Now when you edit one of the record types you will be able to save custom data in your new fields along with the standard data fields.